My primitive flax journey part 4

The path that I have set for myself in getting all of the flax I grew processed and ready for spinning has given me a better understanding. What it would have taken to produce fibers for clothing and other necessities in the 10th century.

The summer of 2022 I was able to break and comb, over half of the bundles. The process had to done outside during dry weather. The flax will absorb moisture from the air and not break well so that limited how often this could happen. I stored the flax indoors as It was getting processed, so I would not absorb moisture ourside. I think it made a big differeance with the finished product,

By now the time is running short. September is app, aproaching and my goal is to get all the flax breaking done. Once the damp weather starts, it wouldn’t be till the next summer that it could be done. That was unacceptable. I decided to do comparison and use a more modern break design from around the 14th ,. Having friends who also work with flax , I was able to borrow one. Made for her by her husband out of oak. We made some video showing the process using each one with my commentary on the pros and cons of each way to break the fibers Unfortunately, that video has been temporarily lost. I will do my best to to recount my findings.

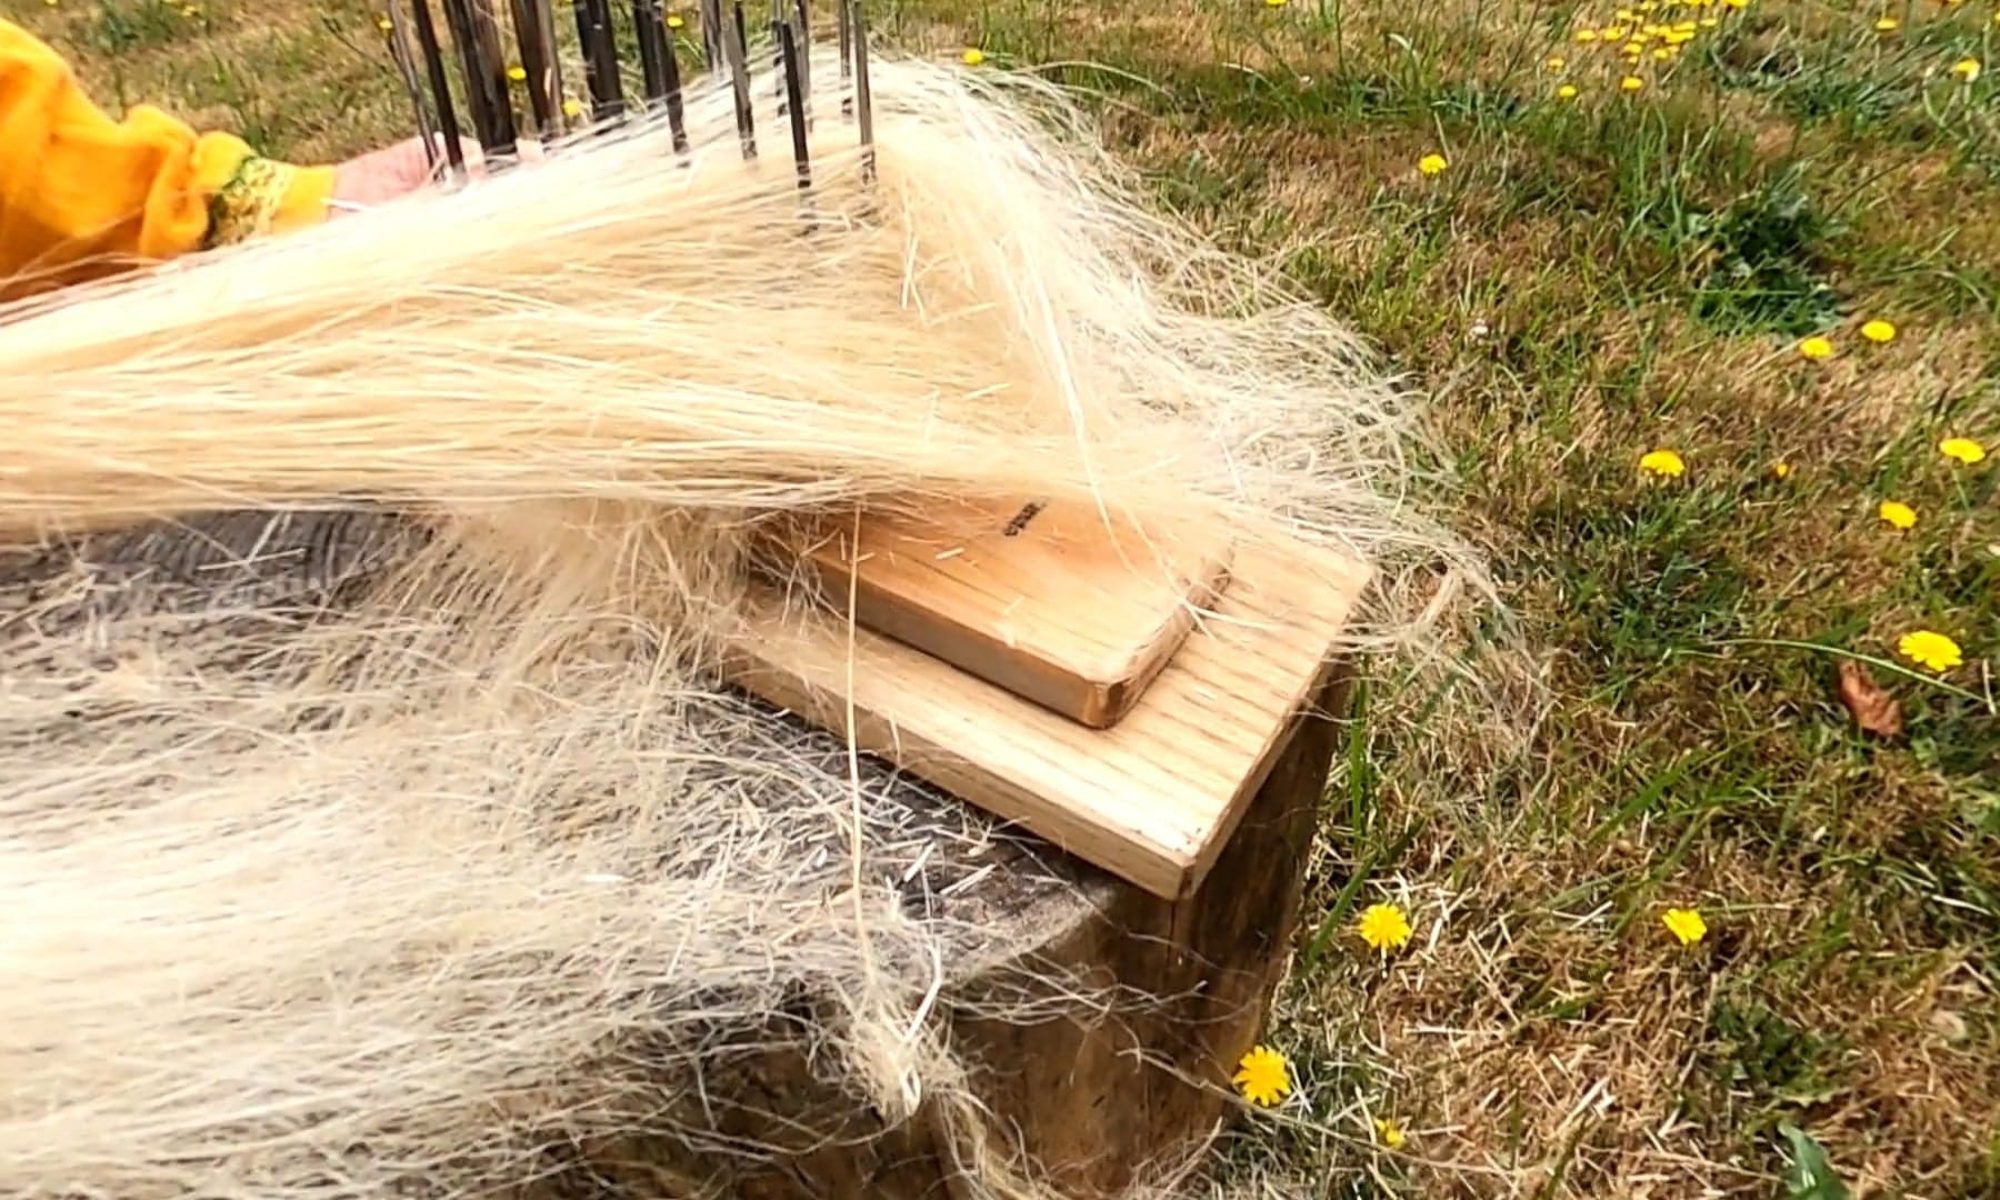
My goal was to compare how much effort the two processes took and well as the time The modern break needed smaller bundles but only took 3 to 4 minutes. The Mallet and V – cut stump allowed for a larger bundle to be broke but took 5 to 6 minutes approximately. For the effort involved in the breaking of my arms. With the mallet, the motion is in front of you, up and down. With the modern flax break, The motion is to the side, Bringing your arm up and having to use a lot of muscle to get the job done . The more ‘modern. break has a channell where the upper piece goes into breaking the stems. A terrible description, not the easiest thing to describe. I will upload some pictures when I can to help. I found that the side motion was harder on me than the forward motion using the V cut stump. I was glad to have done the comparison as I gained more insight into the process. Now all of the flax was broken, combed and ready for the next part of the journey. Spinning

Here is all of the finished fiber that I grew and processed. I am very happy with the color and quality. The journey continues…

My primitive flax journey Part 3

There has been some progress even though it has been awhile since I have written about it. In the past I have written about the growing and processing of the flax plant . Then on to the start of retrieving the fibers from the shaft.

The original flax mallet I used was made up of two pieces, handle and mallet. It could not take the pounding and came apart. I was able to get a mallet out of one solid piece of maple wood from my neighbor that lathes wood. This new mallet held up perfectly. Heavy enough that with every down stroke to hit the fiber was not as labor intensive as I would have thought. I did have to start wearing gloves as I was getting new calluses, one blister at a time.

The mallet broke the flax with great efficiency. It was very satisfying to see the shaft breaking off exposing the fibers. It gave me renewed energy when my muscles would start to complain,

The next step, usually, is to use a ‘scutching knife’. A piece of wood shaped like a knife but with rounded edges. Laying the broken bundle over a flat board and raking down on the fibers to remove more of the outside woody shaft. I prefer to use my fingers, raking my fingers through the stands. Using my nails to remove. as much of the shaft as possible. I saw it done this way on videos of fiber production from the Ribe Viking Center in Denmark. I hadn’t been able to land my hands on a true scutching knife so I improvised. Being pleased with the results I choose to continue to do it this way.

For the next step, the flax is combed using what is called a ‘hackle’. It is a piece of wood with nail going through it to make a comb. My first hackle was made for me by HE Sven Redbeard OL. It has hand forged nails 4 inches long. Not to closely spaced as it is for the first combing to remove more of the shaft from the fibers. It also removes shorter fibers, which I will save and recomb. They can still be used. Now I use a finer comb that I was able to find on the internet. An antique from the west coast. The nails on this one are shorter, sharper, and closer together. Now most of the shaft has been removed, not all though, I still needed to find one more even finer hackle to remove last bits. The fibers were looking fantastic. They felt silky to the touch and had a really nice blond color.

the next part of this journey is to get all of the bundles I have processed. Approximately 26 .

There is video up on youtube now that is showing my progress up to this point. Many thanks to Maricka for the video she took and edited.

Flax Journey Part 2

In my first blog I spoke about the growing of the flax and how I got to the point I had a good product to start processing.,
When I first started wanting to grow, process, spin, and weave linen, even if only a small piece of fabric, I was going to use traditional methods. I ordered the plans to make a break and all the other tools needed to process linen to thread for weaving.
During this time, I became more involved in living history and wanted to try and find out more about how fax would have been processed during my chosen time in the 10th century Iceland.
In my research I found that the flax break was not in wide use until the 14th century. There is evidence of examples of breaks before the Viking age, only one or two have been documented. The use of such in Iceland was not much of possibility.
What I did find is the except for the break, the other tools, scutching knife, hackles and weaving methods were in my time period. Question now was to find how flax was broken before the break came into being
I found that a ‘flax mallet’ is what was used. Some theories suggest that the dry shafts were pounded on a flat surface or over the edge of a large stone. I came across mention of a stump of wood with a V cut in the top to aide in the breaking. The depression in the log making breaking much more efficient then on the flat surface or over a stone. I am sorry I can not at this time confirm my source, when I find it, I will certainly share it. It did make sense; I know I did not come up with it on my own.
Hopefully, I have given some insight on why I have undertaken this venture. It is the way I would have done it had I lived in the 10th century, with the research and documentation I have found up to this point.

Flax life

This is my first blog! In my daily life I am a professional horitculturalist. I became interested in growing flax 4 to 5 years ago. It is a way to blend my daily profession with my passion for historical reenactment in the viking age. My personal is based in the 10th century long before the later period flax break was used. It is a bit more work but I am finding that it is working quite well.

I bought seed form Richter seed in Canada. My first attempt was planted in March in 2014, in ground be on my property in Poulsbo. It started to come up great and when the first true leave came out the whole bed was eaten down by rabbits and it never recovered and the weeds took over.

The next year I planted in 5 very large nursery pots so to avoid the rabbits. It grew fine I had my first harvest. I dried it and then Retted it in large tubs I had had. This being the hardest part to get right. This batch alas was not retted well enough and the shaft would not separate from the fiber. Second attempt down.

My third attempt was in 2017. I built a raised be so I would not have so many weed and I could cage it off with chicken wire to protect it form the rabbits. It was 120 square feet. I planted it in rows about a foot apart. The flax grew strong and was perfect. This time I also quit watering it about 3 weeks before it was harvested.

I waited until the seeds had begun to turn brown and then harvested. I pulled it up holding on at the base to get the root. I bundled it into 4 inch bundles and propped it up on the chicken wire to dry. The weather was dry and warm so that was good. I let it dry for 3 weeks until it was good and dry. I then retted (retting is when you soak the dried flax in water to rot the cellular tissues and pectin of the shaft off, which causes separation of the fiber from the stem) all the bundles for 7 maybe 8 days and then dried it again. On the first trial of breaking I realized it was not retted long enough. I broke a few fibers and the shaft would not separate from the stem. The weather was getting cold so I had to store it till the next summer when I could try again. I then retted all the bundles again for 5 days and set it out to dry again. Once dry I have been storing it until I had the time and tools to do so. Thankfully the fiber does not go bad.